Showing posts with label Flash. Show all posts

10 July 2021

Use Flash to Help You Regain the Passion!


"In photography there are no shadows that cannot be illuminated."
~ August Sander

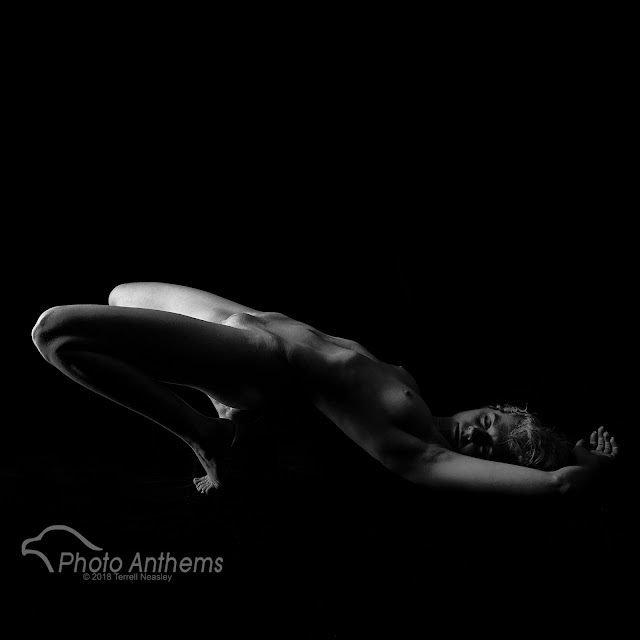
Art Model, @Kayci.Lee, ©2015 Terrell Neasley
Studio Flash, Paul C. Buff Einstein 640 with 6' Octobox

In many of my posts, I mentioned one way to expand your efforts to get excited about photo again was to start using flash in your work. Now, granted... this post won't be necessarily for everybody. Some of you togs already have a great grip on this thing and it's not your weakness by any stretch of the imagination. If that's the case, then just enjoy the pictures. However, if you do NOT have an acute aptitude for artificial light, namely flash lighting kits, then let's start small and follow me a little ways down the rabbit hole. Just bare in mind, this is not a comprehensive blog post on flash. There is too much to get into for a few paragraphs. For now, let it lead you to further research, but if you have questions, pop them into the comments.

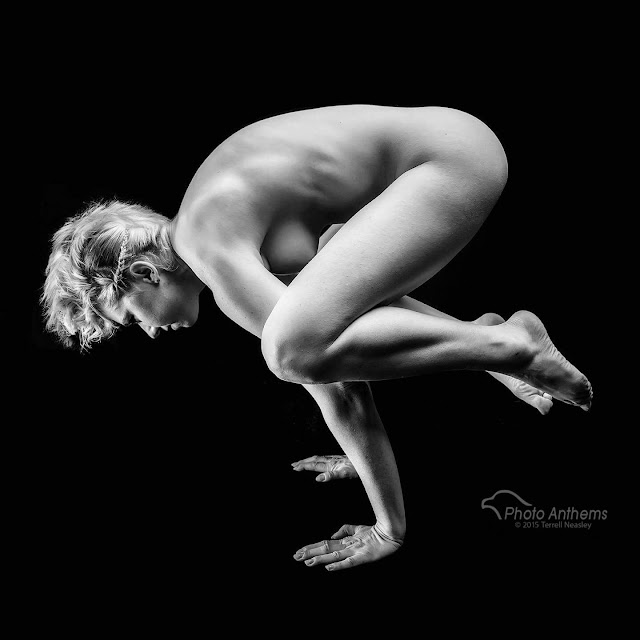
Art Model, @Kayci.Lee, ©2015 Terrell Neasley
Studio Flash, Paul C. Buff Einstein 640 with 6' Strip Box

First things first. Can't be scared of light! As I have said before, most photog won't use it cuz they're scared of it. Ignorance of a thing is not a reason to fear a thing. Also, light is cheap. Yes, you can go pick up the high end flash units by Sony, Nikon, or Canon and pay skyward of $600 for a speedlight flash gun. If that is not a problem for you, then by all means, go for it. It will serve you well. If you need to start out on a budget, consider finding used gear like the Canon 430EX II or the Nikon SB-700 for your run and gun, on the go needs. I STILL use the Canon 430EX II that I bought used, even though I shoot Sony! I never shoot with the flash sitting on the camera, preferring instead to use flash triggers like I will point out in a minute. I have to travel small and make due with as little gear as I can get away with while I am traveling. You can find used these flashes give you lots of latitude and features that eliminate most every possible excuse you may have. You won't outgrow them and they will probably wear out from use long before they become obsolete.

There are also more options available to you. First, you can rent for a weekend for $20 bucks. Second, you can go off-brand with several makers. Check out Godox brands that have speedlight flash units for $100 to $200. You can pick these up for your specific camera brand, such as a Godox VING V860IIC which is one version made specifically for shooting TTL for Canon cameras (Notice the "C" at the end of the model name). TTL means Through The Lens, but for now just think of it as automatic mode. If your camera is in automatic AND you have it ON the camera, it communicates with the camera and sets the flash power for you. However, I strongly advise to learn manual control and practice shooting OFF-CAMERA! Be sure to get the version that is made for your camera brand.
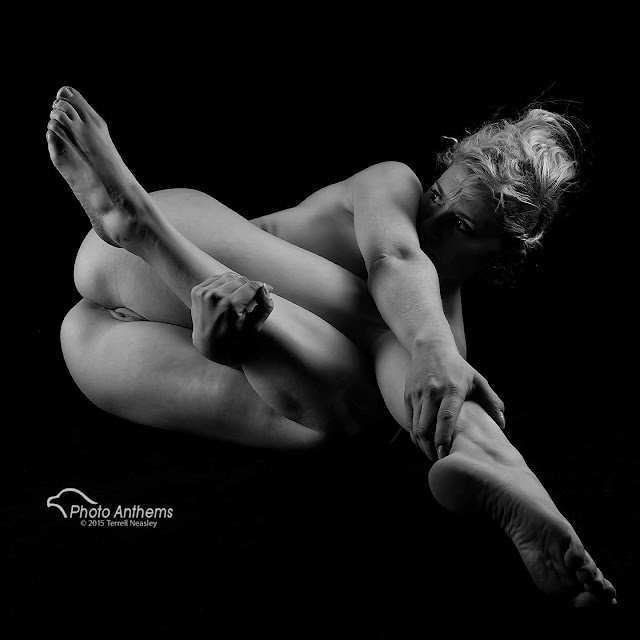
Art Model, @Kayci.Lee, ©2015 Terrell Neasley
Studio Flash, Paul C. Buff Einstein 640 with 6' Octobox

And if you want to shoot with the flash OFF the camera, take a look at the wireless transmitter/receiver systems. It uses a radio signal that isn't so easily obstructed by a wall, for instance, if your flash sits around the corner. Easy-Peasy! This gives you the ability place your flash unit anywhere you need it besides just sitting on top of the camera. Pick up a light stand or clamps for something to mount the flash on. I'll also add in there to pick up an umbrella holder so the flash can be mounted on something that can allow it to bend and point in any direction. 

On another quick note, studio light kits are the best! I shoot with them more than speedlights when I am not traveling. These kits usually come with a two light set-up and will often include some type of modifier... possibly an umbrella or softbox. I implore you to take a look at them if they suit what you do.

"Essentially what photography is is life lit up."
~ Sam Abell

I could throw in one more accessory, which is a flash diffuser of some kind. Is it necessary? Yeah, kinda. I don't really use a flash without something diffusing the light a bit, but I've seen plenty. It's kind of like a saddle on a horse. You don't HAVE to use one, but if you don't, it's gonna be a hard ride. Okay, screw it... pick up an umbrella while you're at the camera shop. Now, back to my main thing. For about $200 you can practice and get a better grip on flash and really step up your work. Flash is cool because it's lightweight and portable. All you need is some double-A's and you're off and running. Keep in mind. Flash isn't just used for night time shots! The question I get most often is, "Why would you use flash during the day?" Simple... Cuz the sun can make harsh shadows. Using flash as some fill light is an excellent solution. Now your model doesn't have to squint because the sun is in her/his eyes. And you can face the model away from the sun without their faces going into shadow. Oh yeah. Try exposing for that beautiful sunset AND your model without using flash and you'd better be good at composite work. Flash isn't just for studio. I take it with me just about everywhere.
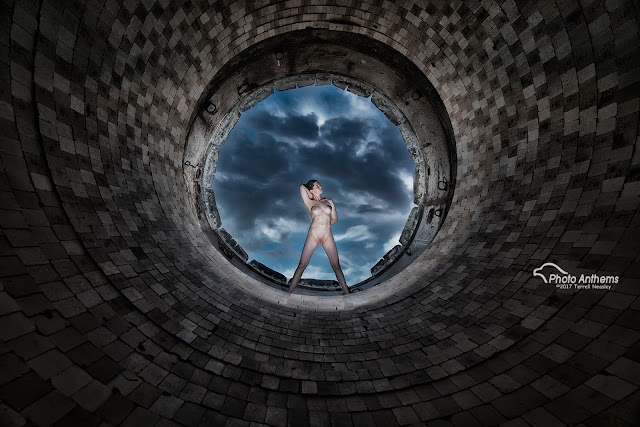
Art Model, @Kayci.Lee, ©2017 Terrell Neasley
Outdoor using Speedlight flash units with radio triggers

Do yourself a huge favor and just run through the manual. It may look thick but that's just cuz it's also in several different languages. Know how to turn it on and set power levels for starters and then go shoot. I'm not often shooting at 1/1, which is the full power setting. I'm usually at 1/8th power or below. Set the flash up about 45 degrees left or right of your subject. Now chances are, you'll have to manually adjust the power settings, but even with that, once you get it within a tolerable range, you can adjust your aperture to control the flash. Big Tip: Shutter Speed controls ambient/constant light (daylight or lighting that stays on). Aperture controls Flash. Opening up the aperture increases the flash's intensity, while closing down does the opposite. So within a certain range of exposure, you can use the aperture settings (shooting in Manual or Aperture Priority Mode) to control the flash output.

Play with this in varying degrees of light as well in different locations. Try out some studio light kits! Add on a softbox with it. Add in more lights... such as one mounted BEHIND the subject! Trust me. It will bring the fun back. If you're going to be in the Las Vegas area, check out B&C Camera at 4511 West Sahara, open every day from 9 am to 7 pm, except for Sunday hours which are 11 am to 5:30 pm. I used to work there. It's a beautiful store with lots of knowledgeable people who can get you fixed up. Tell them I said hello for me!

Art Model, @Kayci.Lee, ©2015 Terrell Neasley
Studio Flash, Paul C. Buff Einstein 640 with 6' Octobox


08 December 2016

Alternatives for Shooting When it Gets Cold

Art Model Covenant, "Baby its Cold Outside..." ©2015 Terrell Neasley


The temps dropping fast here in Las Vegas. I can only imagine what things are like in New England or the Midwest. Actually, I don't even want to imagine it. I'm having my own difficulties handling these frigid temps where its hovering around the mid-40's at night. (Don't judge me.) But the more important question is this:

What's a photographer to do when she/he is used to shooting outdoors and is partial to late evening and night time shoots?

Good question.
Art Model, Franki Dame Hotel in Las Vegas, ©2016 Terrell Neasley
Well, you're going to have to get smart about it. As well as get out of your comfort zone. You can't stop shooting. Let's get that established as priority one. Photogs don't go into hibernation until the spring. If you try that, you'll start the spring off with some major suckage...and nobody wants to suck that bad. So don't get out of practice.

Instead, when things get cold outside, you bring all your business inside. I know...that likely means studio and you're going to throw out the "natural light" card. Well, if you want to be a shooter, you're going to have to learn ARTIFICIAL LIGHT. Okay, so the first thing you're going to need is artificial light, obviously. Take a look at some flash options. You're either going the speedlight(lite) route or studio (mono) lights. And then you're going to need some space to shoot in, which is the easiest part. You can temporarily move your furniture around to get that needed space.

Art Model, Christina. Working in my studio ©2016 Terrell Neasley
Lighting might be tougher. First it depends on your budget. Well, actually it all depends on your budget. You can buy what you need or rent the lights you need. Fortunately, you can do both at B&C Camera here in Las Vegas on West Sahara. They've got some excellent beginner kits as well as some advanced 2-light kits that'll get you started. Here is the top flash monolight kit I recommend:

The Promaster SM300 Digital Display 2-Light Studio Kit for about $450.

You may need to purchase some additional softboxes, but you can get that later if you want. It comes with flash sync trigger that attaches to your camera's hot shoe, as well as light stands, reflectors, and a carrying bag. I've recommended this kit to several of my clients and gave instructions on their use. They are very simple and easy to use. This is a middle ground beginner kit at 300 watt-seconds which should satisfy the majority of everything you'll need. While it may be easier to go with LED lights, which are constant light sources, but your best options are going to be with flash.

Art Model, Leslie my living room couch ©2016 Terrell Neasley
You can purchase speedlights for your specific camera brand, (Canon/Nikon/etc.), or you can go with some manual flashes, also by Promaster which are way less expensive. You can also rent studio lighting from B&C as well. Check out their rental options for your needs online or visit the store and let one of the associates help you determine your best option for what you are looking for. Anyone up there can help you figure out exactly what will do the job for your budget.

Art Model, Justine. Still cold, Late February ©2013 Terrell Neasley

Another option you have at your disposal is hotel rooms. I've done this plenty of times. Sometimes its actually too hot outside or your model doesn't want to be around nature. I've packed up studio gear and rented a room in several of these hotels in and around Las Vegas. The best option is to shoot during the low occupancy times of the week, like Monday through Wednesday. Thursday begins to pick up in business which is reflected in the room prices. You can literally pay $20 a night on a Tuesday and that same room will go for $120 a night by Saturday. At the very least, use the opportunity to explore options for your own stay-cations or to help with recommendations when your friends/family come to Las Vegas and you don't want them staying with you! Try to use discount sites like Travelocity, Priceline, or Booking.com rather than the actual hotel website.

Art Model Covenant, close crop, wide aperture, shallow DoF ©2016 Terrell Neasley

Shoot in your OWN house or apartment. You'll be surprised what natural settings can do that don't have to look like a 4-star hotel. If need be, use a lenses with really wide apertures. Prime lens with f/1.8 or f/1.4 apertures are excellent for this. They give you the shallow depth of field that blur out clutter in your background. Shoot compositions that are tightly cropped in to your subject or model to further reduce clutter in your background.
Panda, my kitchen with a wide aperture ©2011 Terrell Neasley
Finally, go get yourself a hardy model who can handle a little bit of cold. Pack some warm blankets, a thermos of hot chocolate/coffee/tea, and keep the car running with the heat on close by. I have actually done ALL of this. I've had some great models who braved that cold and sacrificed comfort for the sake of art, including getting in cold water! Yes. This is true. Be smart. Always stay conscious of the risk. Often times, I'll brave that water WITH my model, just so I'm aware of what my model is experiencing so that I don't ask them to be wet too long. Model safety is priority one at all times. Always stay conscious of your model's comfort and health. Outside of that, keep shooting!

Super Trooper Art Model, Covenant February. Pretty damn cold ©2015 Terrell Neasley

09 November 2014

Flash

Art Model, Covenant ©2014 Terrell Neasley
Studio lighting - Einstein E640 mono-light mounted with a soft box to model's right and Nikon SB-700 with Gary Fong Lightsphere diffuser to the left rear
"In photography there are no shadows that cannot be illuminated."
~ August Sander

In my last post, I mentioned one way to expand your efforts to get excited about photo again was to start using flash in your work. Now, granted...this post won't be necessarily for everybody. Some of you togs already have a great grip on this thing and its not your weakness by any stretch of the imagination. If that's the case, then just enjoy the pictures. However, if you do NOT have an acute aptitude for the ambient and artificial arts, then lets start small and follow me a little ways down the rabbit hole.

Art Model, Covenant ©2014 Terrell Neasley
Lit with a Maglight for 2 seconds
First things first. Can't be scared of light. As I mentioned in previously, most photog won't use it cuz they're scared of it. Ignorance of a thing is not a reason to fear a thing. Also, light is cheap. Yes, you can go pick up the high end flash by Nikon or Canon and pay skyward of $500 if you want to but come on, its a pop of light. Now speaking mainstream, I like either the Canon 430EX II, which I used for years (along with the 580EX II). With Nikon being my main system, I blast with the Nikon SB-700. Both of these are in the $300 range and that's a good start. These flashes give you lots of latitude and features that eliminate most every possible excuse you may have. You won't outgrow them and they will probably wear out from use long before they become obsolete.

But even if you can't or don't want to swing $300 at the moment, you still have options. First, you can find something used for a hundred or so. Second, you can rent for a weekend for $20 bucks. Third, you can go off-brand with several makers, most notably Yongnuo brands that will be under a $100. Second, you're gonna need some radio triggers. This gives you the ability to take the flash off of the camera, which brings me to my third thing which is a light stand, for something to put the flash on. I'll also add in there to pick up an umbrella holder so the flash can be mounted on something that can allow it to bend and point in any direction. But back to the triggers. This is also too easy. Phottix makes a set for $55, that are great and can be used with any flash system because its manual. There's no TTL setting. All it does is pop when you tell it too. At B&C Camera, you can go to either of the store's two locations in Las Vegas and get a quick run down on how to use them. Easy-Peasy.

Art Model, Covenant ©2014 Terrell Neasley
Lit with flash from model's right side
"Essentially what photography is is life lit up."
~ Sam Abell

I could throw in one more accessory, which is a flash diffuser of some kind. Is it necessary? Yeah, kinda. I don't really use a flash without something diffusing the light a bit, but I've seen plenty and have done it bare bulb too. Its kind of like a saddle on a horse. You don't HAVE to use one, but if you don't, just know its gonna be a hard ride. Okay, screw it...pick up an umbrella while you're at the camera shop. Now, back to my main thing. For about $200 you can practice and get a better grip on flash and really step up your work. Flash is cool because its lightweight and portable. All you need is some double-A's and you're off and running. Keep in mind. Flash isn't just used for night time shots! The question I get most often is, "Why would you use flash during the day?" Simple... Cuz the sun can cause harsh shadows. Using flash as some fill light is an excellent solution. No your model doesn't have to squint because the sun is in her/his eyes. And you can face the model away from the sun without their faces going into shadow. Oh yeah. Try exposing for that beautiful sunset AND your model without using flash and you'd better be good at composite work. Flash isn't just for studio. I take it with me just about everywhere.

Art Model, Covenant ©2014 Terrell Neasley
Lit with Einstein E640 mono-light with mounted soft box from front

Do yourself a huge favor and just run through the manual. It may look thick but that's just cuz its also in several different languages. Know how to turn it on and set power levels for starters and then go shoot. I'm not often shooting at 1/1, which is the full power setting. I'm usually at 1/8th power or below. Set the flash up about 45 degrees left or right of your subject. Now chances are, you'll have to manually adjust the power settings, but even with that, once you get it within a tolerable range, you can adjust your aperture to control the flash. Big Tip: Shutter Speed controls ambient/constant light (daylight or lighting that stays on). Aperture controls Flash. Opening up the aperture increases the flash's intensity, while closing down does the opposite. So within a certain range of exposure, you can use the aperture settings (shooting in Manual or Aperture Priority Mode) to control the flash output.

Play with this in varying degrees of light as well in different locations. Trust me. It will bring the fun back. If you're going to be in the Las Vegas area or live here, get with me. I do one-on-one training for this stuff. Give me at least a week and you'll be up and running in no time with an excellent understanding of exposure control and flash. And when I talk to you next, we'll get a little bit more into locations.

20 December 2012

Getting into Photo, Part 3... The Light


Shot with a Paul C. Buff  Einstein 640 with a large softbox at about 1/4 power from the right side of the frame
 
The word Photography can be broken down into 2 parts; Photo, meaning light and graph meaning to write. So basically, Photography is the process of writing with light and that's exactly what you are doing. Your ability to see visible light, funnel it through a lens, and record an image to a medium is what photography is all about. In its most simplest form, all you need is a box with a small hole in it. That tiny hole will project the view in front of that box upside down on the opposite inner wall. If you place a light sensitive medium on that back wall, you can record that projection.

Most beginner photog will either refuse or misuse flash and thereby call themselves a "natural light" photog. What they really mean is that they don't have a flash, can't work monolights, and can only manage the pop-up flash on their cameras. So they stick to ambient light, which is sometimes call available or natural light. Ambient light is the light that is already present, no matter how strong or direct it is. This may be window light, interior light, or sunlight outdoors. Amateurs tend to believe that you don't need flash when you are outdoors and this is because they don't understand the nature of fill flash.

Shot using off-camera Canon 580EX II Speedlite very low power blended with
available sunlight just to add some fill in the face and to bring out color in dress 

So here's the thing. There is no way I can go into great detail about light in just a few paragraphs on this blog.  The intent is not to leave you with full on flash knowledge, but rather encourage you to not fear the light, to get you in the right gear, and send you  in the right direction to learn light. There are some masterful photogs out there who never use flash. You are not one of them. Get to know and master light. Start with ambient and introduce flash. I love available light and use it as my only light source quite often. Know when it works and know when to bring in some artificial light.

Client shoot, available light only
Now here is my pet peeve. I don't light paying a lot of money for light. Light is cheap and I can't understand why manufacturers want to charge me $500+ for their top of the line flash guns. I can understand underwater light costing a dime or two, but I don't like coming out of pocket for an on-camera blaster like that. $300...tops. That being said, I'm gonna say you can do more than just get by on the 2nd tier flash like the Canon 430EX II, or a Nikon SB-700 for under $300 each. I've had top of the line and can't say the extra power was every really warranted. I don't need to attach a battery pack. I'm never shooting from 100 feet away to warrant the full power of a SB-910, and I'm never shooting so friggin' fast that the less than a second recycle time is a great demand. I prefer the lighter, easier to carry, but powerful flashes of the SB-700 and Canon 430EX II. I've used both. They are great. I damn sure ain't dropping the $630 for a Canon 600-RT. That's monolight range. Which is my second point. If you need MORE POWER... get a set of monolights with battery packs that you can take anywhere. I love the Einstein 640 by Paul C. Buff. Paul C. Buff gear is phenomenal. I also rock with a White Lightning X3200 and use the large softbox and the strip soft box. I even use these on location outdoors by plugging them into my Vagabond battery packs.

Then you gotta check out radio triggers. What's the standard? PocketWizard. The Plus III is now the new boss of radio triggers at $150 per. You'll need at least 2, of course. Now ask me what I like. That would be the Yongnuo RF-603. You can get a set of 4 of these for under $70! And they work like nobody's business. I've never had one fail on me. These transeivers (transmitter & receiver in one) are each firing up to 200ft away. I tested them. The only downside is they only sync at 1/200th of a second vs. 1/250th, but I've been able to deal with that. You can too. Get a couple of flashes and a set of 4 of these radio triggers and you are set.

Using low level on-camera flash swiveld left to trigger White Lightning X3200
off to the left side filling in front side details
The thing is, you gotta learn manual mode on these things. But its easy as pie. A few tips to remember is that shutter speed controls ambient light. Aperture controls flash. So when you are balancing flash with ambient light, keep those considerations in mind. Understand the sync speed of your camera, which is usually going to be 1/250th of a second for pro-level and prosumer cameras. You can get by this by utilizing the high-speed sync function on your flash which fires a series of low-powered flashes over the span of a shutter speeds faster than 1/250th of a second instead of just one big flash. Ever get that black band at the bottom of an image when using flash? That's because the shutter is closing before the flash can illuminate the sensor. The black band is the rear curtain closing before the light hits the sensor.

Another thing to consider is modifiers. These are things that MODIFY how the light comes out and hits your subject. Diffusers, of some sort are the most popular type of modifiers. These scatter the light so your subject is hit more evenly instead of the way harsh direct light flattens out an image and creates ugly shadows, maybe under the eyes, nose, and chin. Reflectors are also popular. You can use the sun to just bounce light back into the subject, but this might be a problem if you're bouncing the light of the sun with a silver reflector back into your model's eyes. What do I like? As ugly as it is, I gotta say the Gary Fong Collapsible Lightsphere is the bomb. It may not look like its worth $60, but when it delivers the shot and you get paid, you rethink that notion. Softboxes on monolights are the only other thing that compares.

Nude hiking, available light only
Bounce the light. You can make the ceiling or a wall into a modifier. Try using filters (included w/Nikon flashes) to help balance flash with ambient (so light is the same color temperature). I like a little CTO on my flash when doing fill for sunset shoots. READ the friggin' manual. Learn the functions. Carry the flash everywhere. If you can swing it, get TWO and shoot Off-Camera using the radio triggers. Get creative. Use one for fill and the other as your key light. Have another one to backlight your subject. Search the internet for great tutorials on multi-light set-ups. If you want to go all out, check into the power of the Sun in your camera bag with the Quantum Lights. Maybe I've already said it before, but those things give you the power of the SUN in your camera bag. You can even get softboxes for flashes nowadays. There's no limit to the way you can alter and play with light. Manipulate it to capture the image that is in your head. I've never needed a 57 light setup like some people. 3...maybe 4 is the max I ever need. And then sometimes I flip the off switch on my flash and shoot natural light. There's nothing like natural light, but you should not be afraid to add a little when necessary. The idea is to master light and that means to know when to use it, how to manipulate it, and when to take it away.

Next...The Print.

Here are a few nice Go-To links to follow through on:

1. Strobist - Excellent source for lighting tutorials, articles, and DIY light building.
2. Adorama TV - Tutorial videos. I have this link specifically related to lighting
3. The Top 10 Photography Lighting Facts You Should Know
4. Painting with Light - Google image search
5. Guess the Lighting.com - Excellent blog that illustrates lighting techniques using diagrams
6. Sketching Light - Book by Joe McNally on working with flashes
7. High Speed Sync - Explanation of how it works
8. Mark Wallace on Rear Curtain Sync
9. Mark Wallace on Sync Speed, High Speed Sync, and Radio Triggers
10. Canon Professional Network - Getting the most from your Speedlites
11. Nikon Creative Lighting Systems - In my opinion, Nikon has the edge in lighting
12. Luminous-Landscape - Another top photography blog that talks a lot about lighting