Showing posts with label Getting Better. Show all posts

29 January 2016

8 Things You Can Do NOW to Improve Your Photography

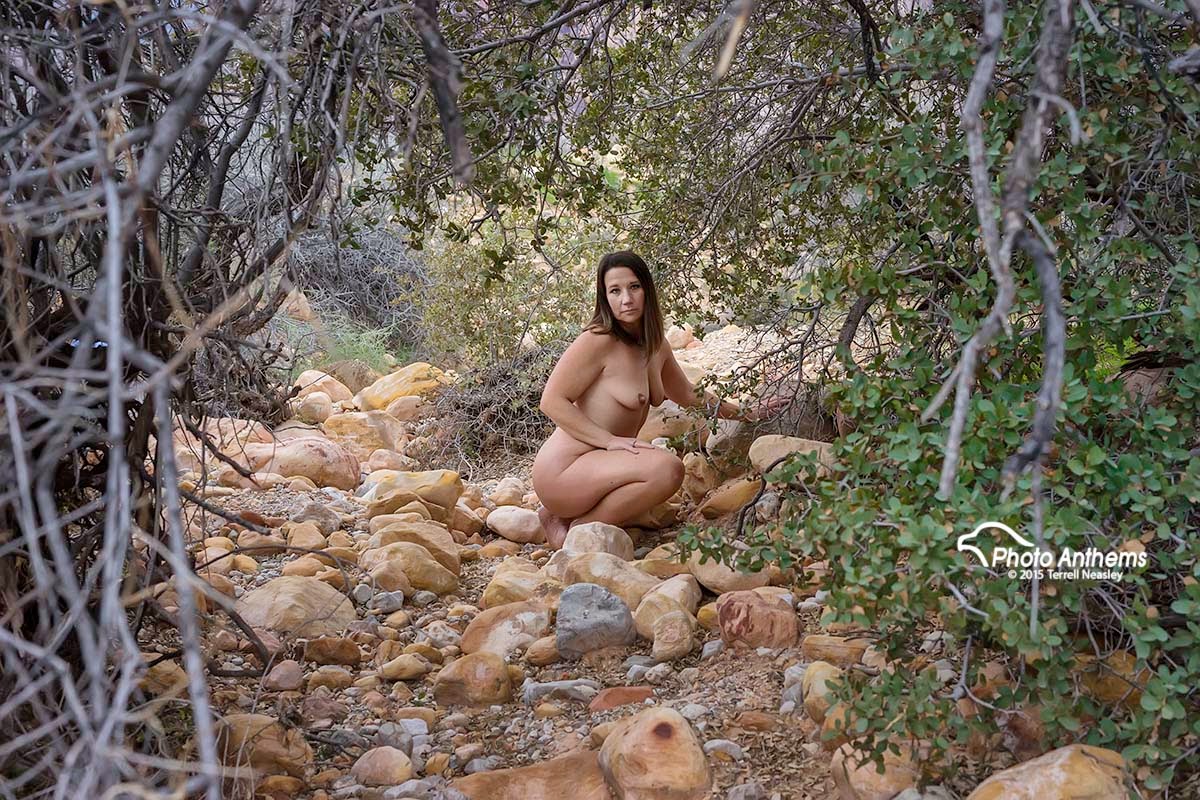
Art Model, Covenant, Back Patio ©2015 Terrell Neasley
Okay. So you know that Spring time is coming around soon. Its the middle of winter and before you know it, the snow will have melted and green grass and flowers will be budding and blooming. You've seen it before. Every year its the same thing. So why not, while you're holed up in the house to stay out of the winter storm, get to cracking on learning your camera so you can be better prepared to take advantage of these great pics you're gonna wanna take in the Spring? Sorta like working out NOW to have your summer body by end of May.


1. Pull Out the Manual
Chances are you have never done this. Not once. Well find it and dust it off. Put down the morning paper for a change and review your camera manual. If you can't find it, then look it up online. Its there. Trust me. Check out the specifications that your camera is capable of and become familiar with them.

Art Model, Covenant, Upper Pahranagat ©2015 Terrell Neasley
"Smooth seas have never made a skillful sailor"

2. Go Shoot!
Find out what you like to shoot. THEN SHOOT SOMETHING ELSE! In other words, get out of your comfort zone a little. Again, comparing this to working out... if you just stick to shooting what you are familiar with, its like hitting that plateau when you know you want to lose that last 20 pounds. Develop your photo muscles by exercising different ones you are not so familiar with using.

Art Model, Panda Nevada Desert ©2013 Terrell Neasley

3. Test the Limits of your Camera
Another familiarization drill! See what your images look like at the highest ISO it can achieve. If it has expanded ISO, check it out. Maybe that noise is doable or maybe you'll need to back it off a stop or two. Test out the high frame rates and see if the Auto Focus misses on any of those shots. If it shoots 5 frames per second. Test it. Maybe all of the shots are in focus, but if not, it will be better to test this before you actually need to use this feature.

4. Play with Flash and Long Exposures
You'll really have fun with this one. Flash can be intimidating, but its really not. Its just light. You use light every day. Play with the flash sync speed. Practice with the Rear Curtain Sync feature. See what it might be good for by checking out YouTube. Use a speedlight OFF of the camera. Pick up some inexpensive trigger/receiver combo to make your flash pop wirelessly. And do this without using the automatic features or TTL. Got a cable release for your camera? Ever use a shutter speed as slow as 15 minutes? What do you think you have that tripod for? Try it out!

Art Model, Panda Nevada desert ©2011 Terrell Neasley

5. Go Look at a Lot of Pics
You can better see what's possible when you start looking at other photog images. I'm not talking about copying other people's intellectual property. I'm speaking to looking at the work of others do get ideas for better lighting concepts. Better perspectives. Better inspiration to maybe shoot outside at night. If you want people to appreciate your work, check out other photog's work. Make comments on their work on Instagram or 500px.

6. Change Perspective, Lenses, Locations
The majority of lens kits are there are of the middle focal length range and this will be the only lens most people will own. Take a look at some wide-angle perspectives. See where this might come in handy. I recall the first time about 10 years ago that I experimented, at the suggestion of a friend, with wide-angle for a model shoot. Didn't think I needed it and why use wide-angle glass for anything other than landscape of photographing large groups. That shoot changed my life! And again with getting out of your comfort zone, take a road trip and shoot someplace new. Make it fun and get up early and do a day trip somewhere 200 miles away.

Art Model, Panda Nevada Canyon ©2011 Terrell Neasley

7. Limit to 36
I did this back in the film days. The idea behind it is that film has a much more limited number of exposures available compared to a SD card which can give you thousands of exposures. Limiting yourself to just 36, or the number of exposures you can get on a roll of film will make you more deliberate. You tend to make sure that the compositions you see have better subjects, are more developed scenes, and will be composed of more photographic fundamental elements that make a good picture. You'll take your time to really begin to see. You train your eye to attain a desired goal that first formulated in your mind. Today, people tend to "spray and pray". They take a bunch of shots and statistically, they are more apt to have at least one good one. The problem is that this great shot is still challenging to reproduce. You got a good shot, but you don't really know how you got it. It just happened. Let yourself be challenged. Do this exercise every now and then of limiting yourself to 36 shots for the day.

8. Commit
And this is as self-explanatory as Nike's slogan, "Just Do It". Committing is doing these 8 things plus more. Its leaving your familiarities and going out to that new location. It's heading over to B&C Camera (if you're here in Las Vegas) and rent a wide-angle lens, some studio lights, or a new camera you want to try out. Check out Sony's A7sII and play with its ISO to see what 409,600 looks like. Use it with  a 16-35mm lens to go shoot the milky way. Rent out a Panasonic GH4 and practice some video work. Need some studio lights? They have plenty. Practice. And commit yourself to this effort. By the March, you'll have that perfect Spring photography body that you'll need to get the best shots and you'll know you have the best shots because you put in the work and preparation to achieve these goals. Have fun!
Art Model, Covenant, Upper Pahranagat ©2015 Terrell Neasley

28 February 2015

Three Objectives for Central America

Art Model, Covenant ©2015 Terrell Neasley, A7MkII
"I am not afraid of storms for I am learning how to sail my ship."
~ Louisa May Alcott

Some of what I'll be doing for all this time that I'll be spending down in Central America will obviously focus on taking fine art photos, portraiture, and street work. This is what I usually end up coming back with the most. But I'll also be doing a few other things while I'm away, as well. I'll have a lot of down time to catch up on reading and also doing some writing. But here are some other goals and objectives (among several) that I'll share with you right now.
Art Model, Covenant ©2015 Terrell Neasley
You always know I always strive to be a better photographer and teacher, so lets start there. If you didn't already suspect or know me, I shoot nudes. That's not all I shoot, but its a definitely a passion of mine. I want to begin there. I want to do a better job of it. Yes. Believe it or not, I have more to learn in that genre. Many of you will probably believe the greater fact is that I ADMIT to needing to learn more. I do not know, as of yet HOW I will approach this objective. I can do my own study and research, but I think I will learn best by consulting with some mentors like Dave Rudin or Dave Levingston. Should I take a class of some sort? Maybe do a workshop that has a direct focus on photographing the nude? Something I have thought of doing for years has been to visit Prague. I find that many photographic artists from just east of Germany and on into Russia have been inspirations to me. I find them to be more in tune with my style or of a such that I aspire to.

In addition to that, I need to make a more concerted effort to actually do more of something with my art nude work. I have terabytes of work that no one has really seen. You've probably only seen maybe a tenth of all the work I've done with Panda. Some of my best work with Emma was never made available for about 8 months before anyone saw it. Kristi C has been a most prolific model for me over the last year. Again, most of it unseen. So big, big focus towards exhibition and a consistent venue to show my art nude work will be a major focus upon my return. I'll likely come out of hiatus on photo competitions and do some of those again, but that's an aside. Exhibition will be a more primary focus when I get back. My work needs to be on walls. This is why I do it...nudes or otherwise. I make my stuff to be viewed in person upon a physical medium.

Art Model, Covenant ©2015 Terrell Neasley
"You don't learn to walk by following rules. You learn by doing, and by falling over."
~ Richard Branson


Let's see...what else? Oh yeah...again, photographically speaking, I want to do better teaching. I'm limiting myself to 10 students a year, doing one-on-one, two-week courses. I used to conduct workshops when I first came to Vegas with my Las Vegas Art Models Group. A max attendance would be 12 photogs. Now I teach one-on-one and I want to do it better. The goal is to make it more fun, better information, and less taxing on myself. I just did two students back to back this month. I don't know how teachers do it every day like that...ALL friggin' year!! My friend, Howard suggested doing tours where I take people on some of my travel excursions. I can see that. I've already been asking family and friends to come visit me for a few days while I'm away. Meet me in El Salvador or Lake Atitlan in Guatemala for a few days. We can do some photowalks or just chill with me sippin' Cuba Libres. I need more and better teaching props. Some concepts I have in my head simply don't exist! I need to find somebody to fabricate some of this stuff for me. I don't want to rely on videos to make my point. Hands on physical props would serve a better purpose. So yes, I want to contemplate how I will do this.

Art Model, Covenant ©2015 Terrell Neasley
Video! That's another one. I want to get as good with vids and I am with photowork. I have the A7s, which is excellent for video work. I'll need to get the Atomos Shogun external output monitor/harddrive to do 4K work, since you can't shoot 4K straight to the SD card. But for the time being, 1080p should suffice just nicely. Editing video will also be a key factor, which means I'll also need to bump my subscription to Adobe CC 2014 back to the full version. I downgraded it last Nov to just the Photoshop/Lightroom version. I'll need Adobe Premier Pro back again, in particular. I should also dust off my audio gear. I'll take with me a shotgun mic and maybe my Zoom H4n external audio recorder. My goal is to just make short clips, starting with time-lapse, some slow motion work, and then just build from there. So we'll see. 

09 November 2014

Flash

Art Model, Covenant ©2014 Terrell Neasley
Studio lighting - Einstein E640 mono-light mounted with a soft box to model's right and Nikon SB-700 with Gary Fong Lightsphere diffuser to the left rear
"In photography there are no shadows that cannot be illuminated."
~ August Sander

In my last post, I mentioned one way to expand your efforts to get excited about photo again was to start using flash in your work. Now, granted...this post won't be necessarily for everybody. Some of you togs already have a great grip on this thing and its not your weakness by any stretch of the imagination. If that's the case, then just enjoy the pictures. However, if you do NOT have an acute aptitude for the ambient and artificial arts, then lets start small and follow me a little ways down the rabbit hole.

Art Model, Covenant ©2014 Terrell Neasley
Lit with a Maglight for 2 seconds
First things first. Can't be scared of light. As I mentioned in previously, most photog won't use it cuz they're scared of it. Ignorance of a thing is not a reason to fear a thing. Also, light is cheap. Yes, you can go pick up the high end flash by Nikon or Canon and pay skyward of $500 if you want to but come on, its a pop of light. Now speaking mainstream, I like either the Canon 430EX II, which I used for years (along with the 580EX II). With Nikon being my main system, I blast with the Nikon SB-700. Both of these are in the $300 range and that's a good start. These flashes give you lots of latitude and features that eliminate most every possible excuse you may have. You won't outgrow them and they will probably wear out from use long before they become obsolete.

But even if you can't or don't want to swing $300 at the moment, you still have options. First, you can find something used for a hundred or so. Second, you can rent for a weekend for $20 bucks. Third, you can go off-brand with several makers, most notably Yongnuo brands that will be under a $100. Second, you're gonna need some radio triggers. This gives you the ability to take the flash off of the camera, which brings me to my third thing which is a light stand, for something to put the flash on. I'll also add in there to pick up an umbrella holder so the flash can be mounted on something that can allow it to bend and point in any direction. But back to the triggers. This is also too easy. Phottix makes a set for $55, that are great and can be used with any flash system because its manual. There's no TTL setting. All it does is pop when you tell it too. At B&C Camera, you can go to either of the store's two locations in Las Vegas and get a quick run down on how to use them. Easy-Peasy.

Art Model, Covenant ©2014 Terrell Neasley
Lit with flash from model's right side
"Essentially what photography is is life lit up."
~ Sam Abell

I could throw in one more accessory, which is a flash diffuser of some kind. Is it necessary? Yeah, kinda. I don't really use a flash without something diffusing the light a bit, but I've seen plenty and have done it bare bulb too. Its kind of like a saddle on a horse. You don't HAVE to use one, but if you don't, just know its gonna be a hard ride. Okay, screw it...pick up an umbrella while you're at the camera shop. Now, back to my main thing. For about $200 you can practice and get a better grip on flash and really step up your work. Flash is cool because its lightweight and portable. All you need is some double-A's and you're off and running. Keep in mind. Flash isn't just used for night time shots! The question I get most often is, "Why would you use flash during the day?" Simple... Cuz the sun can cause harsh shadows. Using flash as some fill light is an excellent solution. No your model doesn't have to squint because the sun is in her/his eyes. And you can face the model away from the sun without their faces going into shadow. Oh yeah. Try exposing for that beautiful sunset AND your model without using flash and you'd better be good at composite work. Flash isn't just for studio. I take it with me just about everywhere.

Art Model, Covenant ©2014 Terrell Neasley
Lit with Einstein E640 mono-light with mounted soft box from front

Do yourself a huge favor and just run through the manual. It may look thick but that's just cuz its also in several different languages. Know how to turn it on and set power levels for starters and then go shoot. I'm not often shooting at 1/1, which is the full power setting. I'm usually at 1/8th power or below. Set the flash up about 45 degrees left or right of your subject. Now chances are, you'll have to manually adjust the power settings, but even with that, once you get it within a tolerable range, you can adjust your aperture to control the flash. Big Tip: Shutter Speed controls ambient/constant light (daylight or lighting that stays on). Aperture controls Flash. Opening up the aperture increases the flash's intensity, while closing down does the opposite. So within a certain range of exposure, you can use the aperture settings (shooting in Manual or Aperture Priority Mode) to control the flash output.

Play with this in varying degrees of light as well in different locations. Trust me. It will bring the fun back. If you're going to be in the Las Vegas area or live here, get with me. I do one-on-one training for this stuff. Give me at least a week and you'll be up and running in no time with an excellent understanding of exposure control and flash. And when I talk to you next, we'll get a little bit more into locations.

30 November 2013

Getting Better - Okay, A SEVENTH Thing...


Art Model, Panda and Kiddo © 2013 Terrell Neasley
 “ Twelve significant photographs in any one year is a good crop."
 – Ansel Adams

In the last post, I talked about SIX things you can do RIGHT NOW to greatly improve your photography skills, mainly aimed at the beginner-level photo enthusiast. I'm going to throw in one more idea that I picked up from listening to one of the latest episodes of TWIP. To me, this tip was fitting because I'm already so familiar with it from shooting film for so long. I can also attribute it to some of my days in the military as an expert marksman. And technically, this tip is an add-on to Number TWO from the last post, which was just to get out there and start SHOOTING! Pick up the camera, get out of the house and just go shoot something. Anything. Go for a drive. End up somewhere and start banging on the shutter release button. But now I want you to curb your appetite a bit. Instead of going out to spray and pray, I want you to:

Art Model, Panda and Kiddo
© 2013 Terrell Neasley

TIP SEVEN - Limit it to 36 for the day!

Yeah, that's right. I want you to be more deliberate in your shot selection, your composition, and your subject matter. This works better when you already know what you're going out to shoot rather than having no clue, ending up somewhere, and shooting willy-nilly. So basically, on a day when you know you're headed out for a specific reason, to a special place, to get some nice pictures, ONLY take 36 shots. You can even pull out one of those 512MB SD cards that you never use anymore from back in the day. Take a look at that again...that's Megabyte, not GIGAbyte. I know you've got one lying around there somewhere. Pop that baby in that new 24MP camera of yours and see how many max shots you get. For perspective, if I put a 512MB card in my old Canon 40D shooting RAW (which actually took CF cards), I could about 70 pics. On my Canon 7D (also CF Cards), I might get about 30 shots if that helps put things into better perspective. If I put that same card in my Nikon D800E (takes both SD and CF), I would max out after TEN PICS.

Art Model, Panda and Kiddo © 2013 Terrell Neasley
"Its not the caliber of the rifle that matters, but the caliber of the shooter."
- Unknown

So here's the mind set behind limiting yourself. The number 36 is not an arbitrary number I pulled out of thing air. That's typically how many exposures you would have on a roll of professional grade film. The consumer stuff you'd by at Walgreens would typically only give you 24. Pro rolls were mainly 36 exposures of "full-frame" madness! My fave brand of film was the Kodak TMAX 400. I'd use 100 when I needed to but 400 was more versatile to me, since the TMAX had a T-Grain emulsion that was quite fine...really close to 100 ISO on other film brands, and I had the latitude to push or pull it to whatever I wanted in the darkroom. But enough digressive darkroom talk. Back to topic, you only got 36 shots per roll. Now granted, you could take as many rolls of 36 as you felt you needed, but here's the thing. I only expected to get 3 or 4 shots out of each roll worthy of printing. Of course I would have damn near all of them, technically correct as to exposure, focus, etc. But I'd still be looking for my best 4.

Art Model, Panda and Kiddo © 2013 Terrell Neasley
If you want to get better, slow down. Don't come back home with 1,384 jpeg images on a friggin' card that you now have to download and look through. Slow down...be a bit more deliberate. Look at your settings on your camera, compose correctly for each shot. When its right, take the shot. Think of it as hunting with bolt-action rifle. You wouldn't hunt with a machine gun, would you? Bring a tripod. Even in broad daylight. Maybe even a remote shutter release. Not the wireless kind, but rather the one that plugs into the camera. Or try taking it off the tripod and getting on the ground. Not just kneeling, but lay down on the dog gone ground. Get low. Take your time. See the settings in the bottom of the viewfinder as you are looking at your subject. Make sure they are right and know WHY you are shooting in Aperture Priority rather than Shutter Priority. Know WHY you choose to drop the Exposure Value Compensator. Understand the value of bracketing the shot and how to do it manually when your camera doesn't have the BKT-function. My one-on-one students know this. You can, too. Try to make each one meaningful and purposeful. Know that each shot came out the way it did because you "meant to do that". You'll be better for it.


25 November 2013

Getting Better - Six Photography Things You Can Do Right Now

Art Model, Enyo ©2011 Terrell Neasley
"Day by day in every way I’m getting better and better."
- Emile Coue

Art Model, Enyo ©2011 Terrell Neasley
Lots of people who own cameras bigger than a point 'n shoot, talk about wanting to be better shooters or take better pictures. Many don't know where to start. Or they think they need to enroll in expensive college courses, safari adventures in Africa (where everybody knows the good pictures are), or workshops that you have to take a plane, book a hotel/rental car and then pay for a ticket to get in and sit for 5 hours listening to a speaker tell you about the latest and greatest photographic techniques guaranteed to improve your pictures. Well, I'm here to tell you that you can do those things if you want to, but there are convenient options for you right where you are that cost you nothing. And by no means is this list all comprehensive. There's always more. But to start, 

1. Pull out the manual for your camera. I know. Its dry as hell, but do you wanna get better or not?? The manual is free and it came WITH your camera. If by chance you bought it used, you can still go online and Google the manual for a free download. And if its just too hard to read it, check out Amazon and get a Dummies guide to help. When I teach my two-week one on one lessons, I pick up one for whatever camera system my client is using. Its easier to read than the manual and has added info to help you understand. And the reason is this: You need to know the capabilities of your camera. Its as simple as that. You will be a better shooter if you understand how to utilize the tools that you are trying to use. Automatic mode can do a great job a lot of the time, but you said you wanted to be better. So take the controls and learn how to use them.

Art Model, Enyo ©2011 Terrell Neasley
2. Shoot. Its as simple as that. Get out there and shoot. I don't want to say as often as possible, because your definition of "as possible" is likely different from my definition. So get up now and dedicate some time every day to picking up the camera and experiment with different settings. Try shooting in Aperture or Shutter Priority (which you will understand AFTER you go through the manual). Find out what subject matter interests you, but don't restrict yourself to it. Actually it may also be beneficial to find out what you absolutely DON'T like to shoot as well. As you continue to explore, you may discover that you absolutely hate shooting people. This is different from finding out what you are not good at. If you are not good at shooting people, its far from not LIKING to shoot people. Avoid the things you absolutely dislike, but not necessarily the things you presently suck at. You may get better at those things if you try.

3. Test the limits of your camera. All systems are different as well as people's opinions. Don't just rely on what reviews have said or what you've heard. Try it out for yourself. What is the maximum ISO your camera can reasonably make a presentable shot at? Do you know? Try shooting at max ISO in some low-light situation. Try it at the maximum and then start backing off of that til you're back around ISO 800. Then go get those shot printed! It doesn't even have to be high quality prints...just some reasonable 11x14s to see how things look. Compare your camera's RAW to its JPEG. Test the bracketing features. Set your Auto Focus to the various settings and see how this performs. I did the same thing with my kids when I taught them how to drive. I wanted them to see how a car reacts when you hit the breaks at high speed. (Don't judge me, dammit...)

Art Model, Enyo ©2011 Terrell Neasley
4. Play with flash. How well do you understand your flash's sync speed? Try it out! See why that matters through practical application. Test out the stroboscopic mode (Canon), or the repeating flash (Nikon) and see how to calculate the needed shutter speed given the number of times the flash is to pop vs the frequency. Play with it and see when that might come in handy. Or put to use REAR CURTAIN SYNC! I've seen plenty of photos that could have been improved upon had the user correctly employed this feature. You can also practice lighting techniques using a bare bulb, a flashlight, or your iPhone light to illuminate the face of a model. Many bounce light from above (ceiling), but how many will bounce from below to reduce the shadows under the eyes, nose, and neck...or for perhaps when the subject is wearing a ball cap.

5. Look at a lot of pictures. 500px.com or Flickr.com are ripe for perusing through and getting a feel for what's possible. Find shots you like and try to figure out why you like them or what qualities make them exceptional to you. Break the shots down and look at the way it was composed and lit. Emulate those qualities in your own work. Don't put as much credence in the exposure info. Its good to know if you want to see what settings gave them the shot THEY took, but that does not mean you can set your camera to the same thing and get the same results. Its more important to see what sort of depth of field they got with f/11 or f/1.2 to better understand the mechanics of their shot. But don't expect to now go outside with your camera set the same thinking you'll achieve similar results. They may have taken their shot on a severely overcast day with a wide open aperture and longer exposure to add lots more light. You go out an try it on a sunny day will only result in confusion, frustration, and eventually feeling of self-loathing, inadequacies, and depression. Well, maybe that's a bit far, but the point is don't start thinking like that.

6. Commit. Make up your mind to jump on board and do whatever it takes to be better. Don't worry about gear. Get a basic camera and a cheap 50mm 1.8 lens. Just shoot. That's the main thing. Be serious about the craft and just go shoot. But at the same time don't be too serious that you get frustrated and put down the camera. Be serious enough to study on your own, but if you're not getting it, find a teacher or mentor. Don't get so serious as to take the fun out of it. Learn to love this and do it because you WANT to be better. If you find it isn't for you, no worries. You can back off anytime. But for now. Go For It!

Art Model, Enyo ©2011 Terrell Neasley